Knitted Sewing Accessories, Something has to make sewing up fun!

I know most of us knitters are less than enthusiastic when it comes to sewing,  but sadly most knits require a little sewing.  I was thrilled when Simply Knitting asked me to design some pretty sewing accessories for knitters.  I was really really really pleased when my copy of the magazine arrived.  My designs had become a self-contained pattern leaflet to accompany the cute free gift,  a tape measure in a tin.

on sew simple

I used some left over sock yarn for this set,  it gave me some interesting colour whilst keeping it simple.

knitted jar lid pin cushion jane burns simply knitting

Pin Cushion Jar Lid

knitted needle holder jane burns simply knitting

Sewing Needle Wallet

scissor keeper jane burns simply knitting

Scissor Keeper

Staying with the keeping organised theme,  I have also designed some hanging baskets.  These are also featured in issue 117 Simply Knitting.  The baskets each take one ball of Rowan All Seasons Chunky.

get organised hanging basket jane burns


Sometimes I can be so daft!

You may have come to realise that sometimes I can be a bit, well, daft!  One of those moments came when I was working on my jewellery display project for Let’s Get Crafting.  I had taken the frame apart, removed the back board and attached the knitted piece to the back board.  When it came to reassemble the frame I could not get the back on with the glass in place.  What was I thinking?  With the glass in place the frame would be next to useless; pretty, but useless!

All my projects featured in this issue have a ‘get organised’ theme,  now where did I put my tape measure?…..


jewellery display frame knitted jane burns

So if you are looking for a crafty new way to store your trinkets, why not make one of these pretty little frames.  The frame was an absolute bargain from Ikea, only £4.  Knit the fabric and sew in place around the back board, simple, elegant storage.

Also in this issue of Let’s Get Crafting, I designed some stacking crochet boxes with lids.

crochet stacking boxes

And last but not least,  a little crochet flower garter, to add a crafty touch to a jar.

jar garter

One of the great things about Let’s Get Crafting is you can make all three of the projects above from just one packet of yarn supplied with the magazine!

My favourite project in this issue is by Lynne Rowe,  her Space Invader Wrist Rest would look very much at home on my desk.  I am such a sucker for a geeky knitting project.

lynne rowe space invader wrist rest

Waltham Abbey Wool Show, see what you missed!

Today we got up super early,  8.30am on a Sunday is just unheard of for us.  ‘Why?’ I hear you ask.  Well I had been looking forward to the Waltham Abbey Wool Show since I first read about it back in October.  Doug suggested that we head off bright and early to get there before the crowds.

Being a new show I wondered how well attended it might be and I was stunned by just how many people were there when I arrived at 10.15.  One large hall was home to a wonderful array of stands; designers and traders stood side by side, it was a lovely atmosphere.  Obviously no yarn show is complete until you have encountered at least one ‘mature’ lady muttering, the words ‘manners,  *?!@, again, never, born’.

The Crochet Chain had obviously taken lessons from Black Sheep Wools and were selling full packs of much sought after yarns at greatly reduced prices.  Any of you who have encountered the Black Sheep Wools yarn-dive phenomena will know it is basically a scrum of ‘ladies’ diving into piles of yarn, elbows and handbags flying,  emerging some time later,  slightly dishevelled but beaming with joy at their ‘winnings’.

Some of the exhibitors….

watercoloursandlace

Water Colours & Lace

woolly chic

Woolly Chic

sheeps fleece

The Sheep’s Fleece

never to young

Namolio

(Youngest Yarn Addict Ever?)

jane crowfoot

My Favourite, Jane Crowfoot (Janie Crow)

Jane’s stand is always so colourful and inviting, and her ability to remember everyone she meets is very impressive.

sparkleduck

Sparkle Duck

(I spent most of my money here today)

jan horrox

Jan Horrox

(This was by far Katie’s favourite stand today)

spinning

Spinning Demonstration

knitola

Beautiful kits from Knitola

jeanette sloan

Designs by Jeanette Sloan

So what did I buy today?

  sparkleduckpurple

 Socka – Hand dyed sock yarn from Sparkle Duck,  Who Needs Chocolate?

sparkleduckgreen

Spirit  – Hand dyed sock yarn from Sparkle Duck, Neptune

 debonair

Debonnaire Lace weight yarn, I can not get the camera to do this yarn justice.  The nylon shimmer thread gives the yarn and very delicate shimmer as it catches the light, yet it is still beautifully soft.

namolio

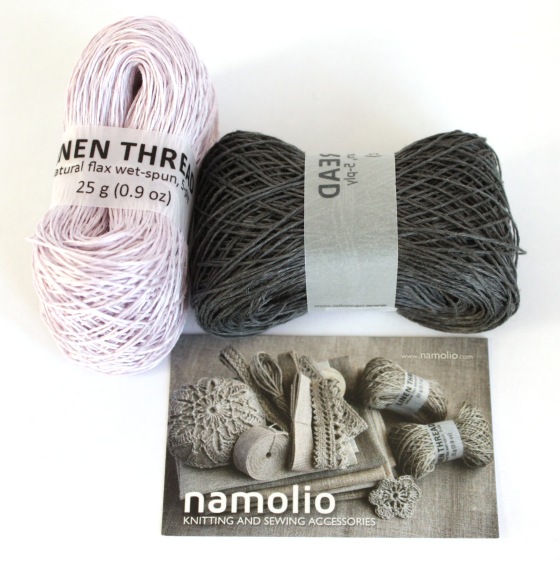
Linen Thread – natural flax wet-spun, 5-ply.  I am looking forward to swatching with this unusual fibre, both knitting and crochet.

As always the best part of any yarnie day out is catching up with old friends and meeting new.  It was really great to meet Jane Lithgow (Jane’s Probably Knitting), I have been a massive fan of Jane’s work since she designed the awesome ‘Cranford Mitts’ (I must confess I have knitted more than one pair).  Check them out and make a difference. The pattern is now offered in return for an optional donation based on the hours of pleasure this pattern has given you and as an awareness raiser for the p/hop campaign in aid of Medecins Sans Frontiers.

I really hope that show returns again next year and more of you get to check it out for yourselves.

Finally,  my ‘legless’ sheep (I don’t like to be judgemental but it was before 11am, far too early to be in such a way).

legless

Nothing says LOVE like a dozen little knitted hearts

Love is the air,  well hanging in the trees!  For the latest issue of Let’s Knit Magazine I have made not one, not two but a dozen little knitted hearts.   Cute aren’t they?

flutterpicpage


This is a great stash busting project, the best way to approach this is to choose a variegated or sock yarn as your starting point.  Then raid your stash for three complimentary yarns of the same weight.  This is what my stash dive yielded.

ittle knitted hearts stash dive

The pattern is written for 4ply yarn, but you could easily work this in DK yarn using 3.25mm needles. You will have bigger hearts! The hearts are worked on a smaller needle size than recommended to keep the knitted fabric nice and dense.

Let your creative side loose, personalise with letters, colour theme to match décor.

flutterthumb

I can’t wait to get these hearts back from the magazine and pop them on my tree….. bliss

As always I would love to pictures of your finished projects on my Facebook page.

little hearts jane burns

You can download your copy of Let’s Knit Magazine from the App Store

Kasbah Faux Fair Isle Sock Pattern, now available

I have a new pattern for sale this week,  Kasbah!  These little beauties combine my knitting loves in one easy to work, portable project that uses up those left overs of self patterning sock yarn.

kasbah faux fair isle socks

Worked from the cuff down this simple sock pattern has Fair Isle bands of easy peasy colour work (because the self patterning yarn is doing all the work for you).  The chart is only worked on the leg and foot, so you don’t have to contend with colour work and shaping in the same round.

kasbah faux fair isle socks

What you will need:

  • 100g plain fingering weight (4 ply) sock yarn
  • 25g self patterning fingering weight sock yarn
  • 2.5mm dpns

The socks fit average women’s – small men’s feet.  You could always experiment with the needle size if you need them a little larger.

kasbah faux fair isle socks

You can buy the pattern from Ravelry, Craftsy or Folksy.

kasbah faux fair isle socks

I would love to see your finished socks on my Facebook page.

Beach photo shoot, warning contains some very white legs!

Finally a day free from rain or gale force winds!   Armed with a box of projects that needed to be photographed we headed down to the beach today.  We had done a little playing with the new camera but today was our first ‘shoot’ with it.  We purchased the Canon EOS 1100D a few months ago and it is a great camera with all the features we were looking for.  A 50mm fixed lens for indoor shots in my ‘studio’, and an 18-55mm lens for everything else (zoom, stabiliser etc.).  I have spent the past couple of months mainly photographing indoors and experimenting with various lighting set ups.   I promise I will post the failures and successes soon. Working outdoors meant there was a chance to experiment with aperture effects; having so much lovely landscape around us meant we could have lovely blurry backgrounds to the clear project. And being aware of framing the shot meant piles of socks and sandy shoes were always near to hand when the toes got too chilly.

winter sun on the beach

We knew that photography outdoors would be particularly challenging due to our very changeable weather.    We used the ‘Creative Auto’ setting on the camera and let it do most of the work.  Lighting was our challenge today,  the sun was so bright.  I am reeeeeeally not complaining about the sun, but too much sun is as difficult as too little.  The blacks items were shining away in the sunlight making the yarn look like plastic.  So time to improvise,  the large umbrella from the car was perfect.   It evened out the light casting just enough shade.

well you don't see that everyday

more play and no work

Things learned;  bring more towels,  although the tide was well out, it was still very damp down on the rocks!  And the rocks are very cold in January!  Dogs like to see what you are doing, and dogs fresh from the tide catcher pool are like muddy wet bombs just primed to go off all over your hard work!   Refreshments need to be plentiful, thank goodness for the snack vendor at the beach today.  Katie is not very good at catching crabs,  Katie will work for ice cream,  Katie is very good at casting a shadow in the right places (if or when she stands still), unlike her Mum (who can stand still like a Boss).

Muddy wet dog bomb

Speaking of cold in January, why else would we all be having to show off so much whiter-than-white leg? It was an odd sight, jeans rolled up to the knees, bright woolly socks – what a vision, all we needed was a knotted hanky on our heads and grandpa asleep on a deck chair with a newspaper over his face.

 legless on the beach

I really enjoyed our first major shoot today,  I think my fantastic assistants did too!  We were all amazed that 3 hours just flew past and that we had taken 282 pictures!

kasbah socks

Jane

x

Doug’s turn:

3 hrs! Who knew?! But it was fun, we each had photos taken of us unexpectedly, we’re mischievous with each other like that. Bizarre that in the chilly January air we were shielding ourselves form the wonderful sunlight – all in the name of art.

Control of the gadget (camera) was my job, most important. Well, tea and biscuits from aforementioned vendor was most important too. So was keeping Katie entertained. And ice cream (with flake). All most important. I had a most important job, second only to the project leader of course. And our be-freckled young first-time model.

emergency supplies

It certainly didn’t feel like 3hrs, and it was a relief seeing the photos downloaded to the PC and seeing that yes, in fact we took some fine shots. Followed by a well earned toffee nut latté, not too pretentious?

just beautiful

We survive for another shoot another day, good fun.

Special ‘me time’ treat, beautiful crochet beaded collar

Way back in October during my visit to The Knitting & Stitching Show at Alexandra Palace, I picked up this beautiful little kit called the ‘Arabella Collar’,  designed by Nicky Hale (alifelikevera).  I had been saving this kit as a  special me time treat and it was, I loved every minute of it!

The kit came with two pattern options, with or without beads.  I would not usually wear a beaded collar, but the beads were such a fantastic match to the yarn that they gave the collar almost a ‘gothic’ look and feel to it.  I have not done much crochet with beads and wondered how simple this project would be. The beading instruction was concise, my advice to you is, don’t over think it and follow the instruction it is a breeze.  The pattern is both intuitive and repetitive, a joy to crochet.  I worked this over two evenings,  I could have happily sat up into the small hours and finished, but I wanted to save it as my reward for doing some ‘actual work’ the next day.  As delighted as I was that it was finished, a little bit of me was sad.


arabella collar

arabella crochet collar

arabella crochet collar

arabella collar picot edge

I just loved the simple yet very effective beaded picot edging.

arabella crochet collar beaded picot

Disappearing cast on

Recently whilst perusing the boards over on Pinterest, I stumbled across a pin titled ‘Disappearing loop cast on’;  I had never heard of this method.  Always keen to learn new tricks I started grokking this cast on.  The pin took me to the TECHknitting website,  where there is a good step by step tutorial.  However I find following diagrams very hard work and painstakingly slow.  I learn best through demonstration, in just a few clicks I found this great video from Laura Nelkin and this had me converted to the disappearing loop cast on in just a couple of minutes.

The benefits of the disappearing loop cast on;

  • This cast on is perfect for items that start from the middle,  so centre out shawls, hats, toys
  • There is no small hole in the centre
  • No slip knot to start, thus eliminating ‘that’ lump
  • Less finishing
  • It just pulls closed

For those of you familiar with the provisional cast on,  you will soon realise just how similar the disappearing loop cast on is. Rather than casting on over waste yarn you are casting stitches on over a loop of your working yarn.

Still not sold?

I have worked a couple of samples to show you the difference.

Originally I cast on 8sts over three dpn’s,  joined into the round and worked an increase round every other round.

original cast on pic

Next, I used the disappearing loop cast on.  I cast on the same number of stitches and worked the rounds as I did the sample before.

disappearing loop cast on

I took both samples off the needles and stuffed them so you could see what they look like ‘finished’.  I closed the traditional cast on sample with a running thread through the cast on stitches and pulled tight to close and secured on the wrong side.  The disappearing loop needed nothing more than securing on the wrong side. The examples were worked in the most unforgiving of yarns, cotton, imagine how invisible this would be worked in wool!

cast on method comparison

              Disappearing Loop Cast on                                 Traditional Cast on